Welcome to Advnture, the new home of AnglersMail.co.uk
Follow our tips to get great fish photography.
It's great to see a quality photo of a new PB or special fish, but it’s equally disappointing when we receive a poor quality photo of an awesome fish. You’ve gone to the effort of catching a prize specimen, so here’s how to take a usable photo – it’s easy really!
1 Prepare
Fish in the landing net? It’s big and you want a photo… First, secure the fish – if it’s a carp or similar large fish in a big landing net with a decent amount of water in the margins, stick a bivvy or brolly peg or bankstick between the spreader block arms to anchor the net to the bank and rest the fish whilst you sort the camera gear. A keepnet or short term retention sling will suffice for other, smaller species but retain for as short a time as possible in all cases.
2 Respect the fish
However, the fish’s welfare must come first. If it’s struggling, return immediately, paying particular attention with species like pike and barbel and supporting them before they’re ready to be released. Take advice from experienced anglers if you’re not sure. Never sacrifice the well-being of the fish for a photo.
3 Unhooking mats
You must use an unhooking mat for anything apart from the smallest of species. Set this up with a suitable background to your photo in mind – reeds or a treeline is fine but make sure you’re not going to be ‘lost’ in a background that might match your green jacket or brown hoodie. Wearing something bright – blue or red work well – can alleviate this and makes for a better photo.

4 Handy mates
If you have a mate who’s handy with a camera, get them in the right position – 6-10ft away is a good starting point – and familiar with how your camera works. A good digital SLR model is best, use Auto settings for easy point-and-shoot results, but a compact camera or new smart phone will also get you a half decent pic. Make sure the focus is sharp and the fish and yourself will nicely fill the screen.
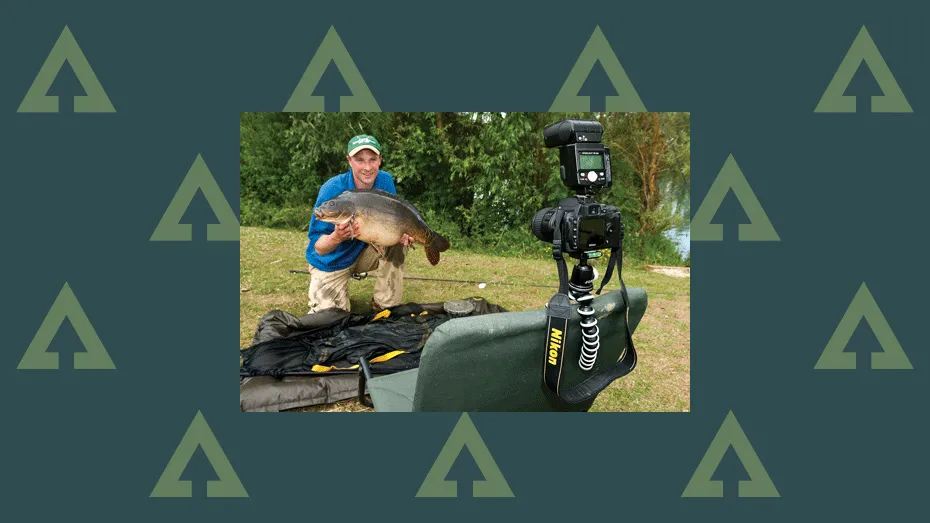
5 Self-takes
Otherwise the same applies to getting a self-take photo – if your camera allows you to, say, shoot 20 photos at 2-5 second intervals with a 20 second delay before starting then this is ideal. Make sure the focus is set and doesn’t just focus on the background – this is a common mistake. Use a tripod.
6 Smart phones
Regarding smart phones, Apple’s iOS 8 has a great new camera with self-timer and full editing options – pick the HDR option at the top of the screen too, and you can activate the focus lock function by lining up the photo and pressing and holding your finger on the screen where you want the main focus to be. This will enhance your results no end. Always make sure you’re shooting in the highest possible resolution available on your camera. If you don’t have an iPhone, download a decent photo app (check out online reviews for the best) which will have similar functions.
7 Rehearse
Take a couple of dummy shots with you holding something of a similar size to your catch and make sure the framing and composition is OK (no heads or fins cut off and no trees growing out of your head or rubbish in the background). Check the focus is sharp by zooming in when reviewing the photo.

8 Ready?
When you’re happy that everything is ready, carefully transfer the fish from landing net to sling or unhooking mat and get it back in the same position. Have a big bottle or bucket of lake or river water nearby to keep the fish and mat wet. Before you pick the fish up, give it a bit of water on the side you intend to photograph.
9 Go!
Picking the fish up with damp hands (no gloves) in the manner best suited to the species, get it in position and take 5-10 photos in slightly different positions as quickly as you can. Quickly review the photos to see if they’re well focused, nicely lit with not too much flash or too little if it’s at night and the fish is well displayed – after all, that’s the star of the photo. Once you’re happy with the pics, get the fish back as quickly and safely as possible.
10 Practice
With practice, this whole process can be done very quickly and with minimal fuss to the fish. Practice makes perfect so try taking a photo of every fish you catch that would make a half-decent photo and within no time your results will improve. You’ll ready to take that killer photo of your next PB.


