Welcome to Advnture, the new home of AnglersMail.co.uk
One of the most important things when targeting carp is to use a safe rig.
This safety clip rig ejects the lead easily, should the main line break or snag up. The other bonus of this rig is that you can change the lead in seconds should you wish to.
The rig is very easy to set-up.

Take a length of sinking rig tube and cut it off about 2 inches longer than your hook length. Cut one end off at an angle (to create a point) and pass the main line through the rig tube, pointed end last. Lick the end of the rig tube and push the pointed end of the tube into the pointed end of a tail rubber.

Then push the main line through the lead clip and tie a number 8 swivel onto the main line (or a ready-made rig – but ensure that the swivel is size number 8).
On most clips there is a retaining ridge that the swivel must ‘click’ past to ensure the lead is released, rather than have just the swivel being pulled out of the body of the clip. Then pull the tail rubber back off the serrations of the lead clip to expose the tag of the lead clip.

Then attach your hook length to the other end of the swivel and moisten the swivel with saliva and push the barrel very firmly into the bottom of the clip.
Slip your chosen lead over the tag of the clip so that it sits in the ‘u’ bend. The sensitivity of the clip can be adjusted by wetting the serrations and slipping the tail rubber over the minimum amount to do the required job – this is useful when fishing very weedy waters and you wish to ‘dump’ the lead which, in turn, makes the fish rise to the surface enabling you to land it safely.
It is always best to stick to using one manufacturer’s rig components as they are designed to be compatible with each other. In this case we have shown Korda components, but E-S-P, Nash and Gardner Tackle all make similar products, and each company’s packaging includes precise instructions on how to assemble them correctly.
You can tie some PVA string round your lead clip if you are fishing it sensitively just to ensure that it does not eject the lead prematurely or lose it on casting.
One important note with any rigs is that there should be nothing fixed above the tubing to allow the rig to come apart in the event of a fish getting snagged, leaving only the hook length in the fish’s mouth and not the lead and the tubing.
The tubing itself does three jobs.
The sinking tubing used here comes in various colours such as weed, gravel and silt and this helps to keep the main line pinned down to the bottom out of the way of wary fish.
If the main line rubs against the flank of the fish during the fight, tubing is a lot less likely to lift any large scales off.
Tubing stiffens up the last couple of foot of the main line allowing everything to be streamlined with nothing for the hook length to get tangled.

A short length of shrink tube added to the eye of the hook at a slight angle extends the shank of the hook slightly and enables the hook to turn over faster into the fish’s mouth. The end of the shrink tube should be roughly in line with the point of the hook.

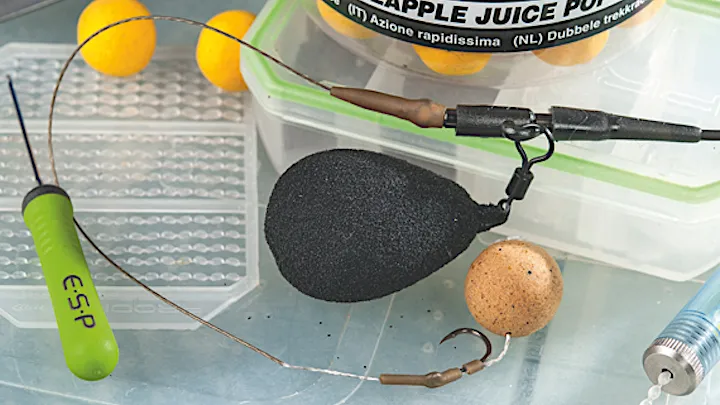
This shows the completed rig with the hook length attached. It is a universal rig and the colours of the components can be mixed up to give a much more camouflaged appearance to suit the background of the area you are fishing over.


