
When you’re pitching your tent, you might just drive the tent pegs into the ground without giving much thought as to technique. Perhaps you just find the angle that allows you to drive in the stakes by hand most easily, or maybe there’s no wind and you just skip the tent stakes altogether. The moment the wind picks up however, an improperly staked tent can tumble off into the distance while you’re busy sipping a hot chocolate round the campfire, or collapse on top of you in the middle of the night, which doesn't make for the best camping memories.

Learning how to stake a tent correctly takes no time at all and is a vital skill for camping in the wind or in rainy weather. A properly staked tent provides stability, durability and better waterproofing, keeping you and your best camping gear safe and protected. Here’s how to do it:
1. Get Y-shaped tent pegs
If you don’t already have them, replace your existing tent pegs with a set of Y-shaped aluminium stakes. The shape of these will give you maximal staying power for three-season camping. For most types of terrain, 7” stakes are good, but if you plan to be camping in sand or snow, look for 11” or 12” stakes.


2. Perfect your staking technique
For every stake, apply the following technique for optimal stability:
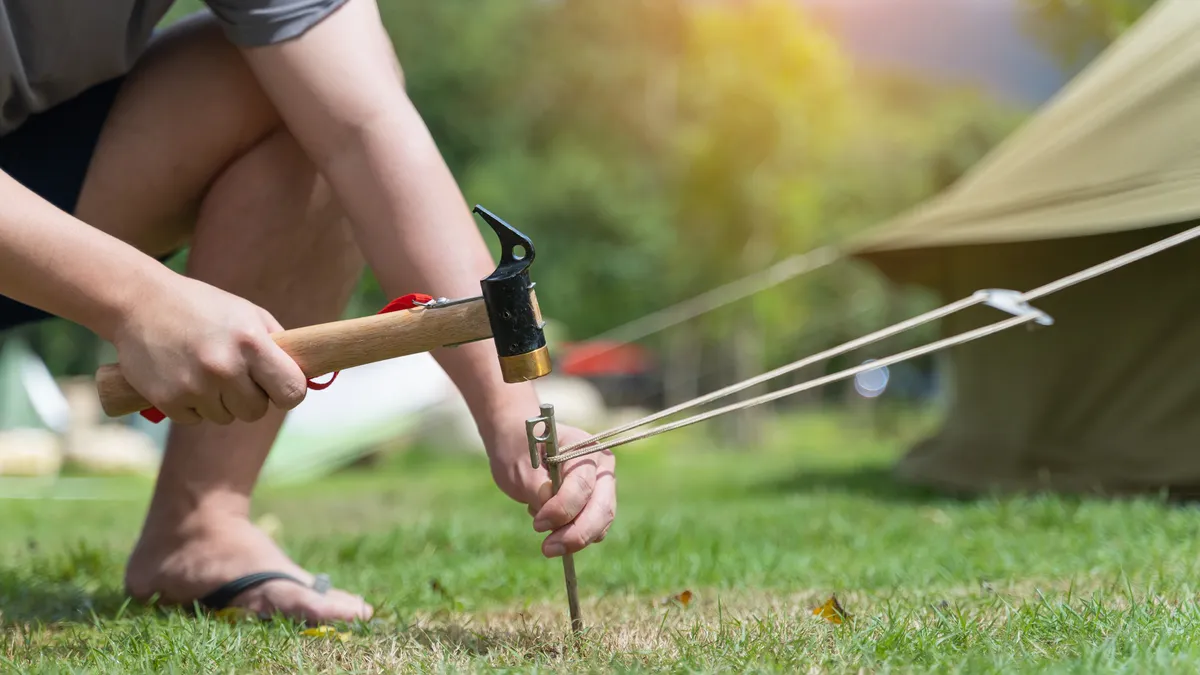
- Use a camping mallet or a rock – using your foot or hand has less force and can bend the stake or drive it down at the wrong angle as you find the path of least resistance.
- Turn the hook of each stake so it faces away from the tent for optimal security.
- Hammer the stake down vertically into the ground – this ensures maximum resistance from the surrounding soil against the tent peg.
- Drive each stake as far down into the ground as it will go so there isn’t any sticking up above ground level.

3. Stake out your footprint
Once you’ve found the perfect spot to pitch your tent, it’s a good idea to stake out your tent footprint (or groundsheet) to maximize its ground coverage. Lay it out on the ground and stake the grommet at each corner. Your footprint should be flat, but not too taut.
4. Stake out your tent
Lay your tent out flat on top of the footprint and insert the tent poles. Starting with one corner, pull the buckle out and stake it so it stays in line with the seam.
Next, go around and do the diagonally opposite corner, keeping the stake in line with its seam to create even tension. As you finish up with the remaining buckles, don’t pull so hard that you pull the other stakes out of alignment with their seams.
5. Stake out your rain fly
Now, cover your tent with your rain fly and stake out the loops at the bottom of it. You’ll also want to stake out the guy lines to properly pull the rain fly away from the edges of your tent and provide the best waterproofing. The guy lines are those little ropes on your rainfly that no one knows what to do with, but don’t worry, it’s simple. Tie a secure knot at the end of each guy line and stake it into the ground. Then slide the tensioner – the little plastic thing – on the guy line up toward the tent to take out all the slack.
6. Reinforce your stakes
If any of your stakes are in unstable, loose soil, reinforce them by placing a large, heavy rock on top of them.
- How to choose a backpacking tent: hike with the best shelter

