
Have you ever wondered, what are contour lines on a map? Perhaps you know what they are but aren’t aware from where or when they first appeared? Maybe you want to know how to use them more effectively when you’re navigating in the backcountry? If the answer to any of the above is yes, you’ve come to the right place.
What are contour lines on a map?
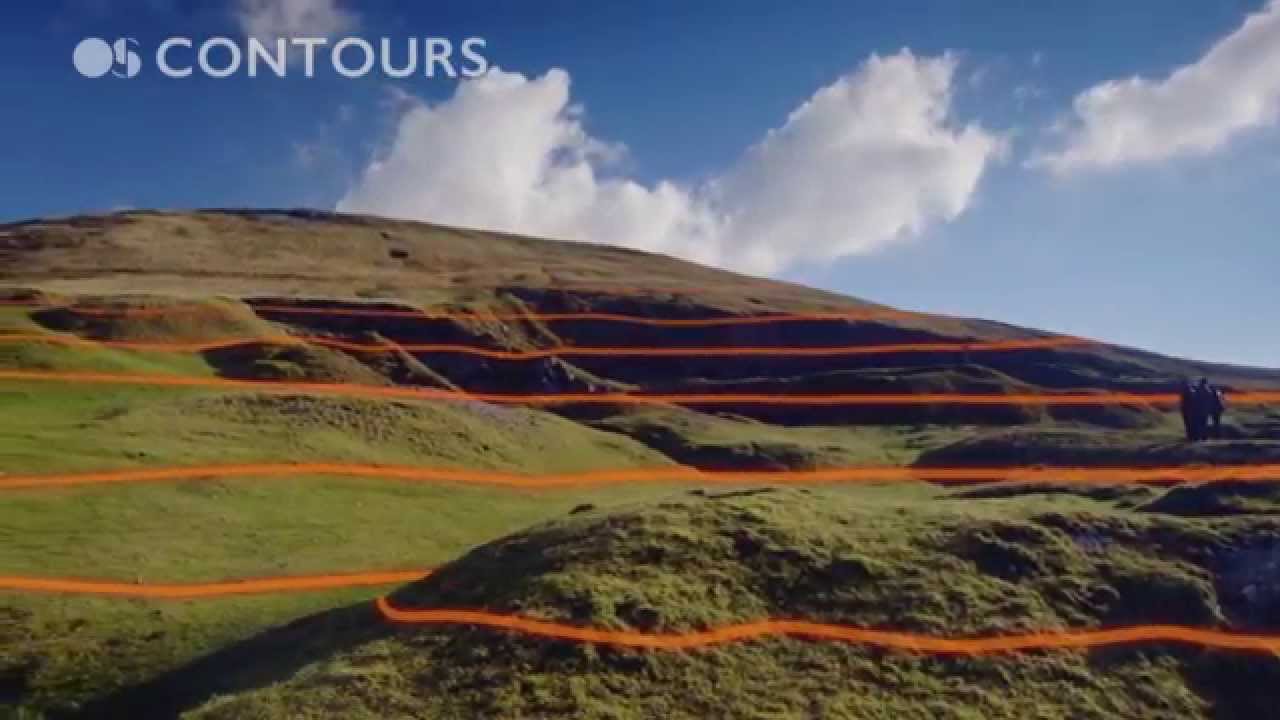
So, what are contour lines on a map? Contour lines are used to represent the elevation of terrain on a topographical map and therefore represent the shape of the land. By studying contours, a proficient navigator will be able to identify valleys, hills, summits, ridges and steep ground just from looking at lines on the map.
Every contour line represents terrain of a certain height above sea level. The intervals between each line are always the same in terms of elevation difference. This interval depends on the scale of the map, though many 1:25 000 scale maps use intervals of 10 meters, while 1:40 000 often use intervals of 15 metres. So, on a 1:25 000 scale map, the line above the 400-meter line will be the 410 meter line, then the 420 meter line and so on until you reach a peak.


Contour lines that are close together indicate steeper ground than those that are spaced further apart. So, excessively steep ground, where you might need to swap your hiking boots for climbing shoes, is shown by contour lines that are bunched together. Areas on a map with few contour lines indicate relatively flat terrain. It’s often the case that key contour lines are bolder than others, such as every 50 meters on a 1:25 000 scale map.
The video below explains contour lines with handy visual examples:
Using contour lines when navigating
When finding your way around the backcountry and knowing how to read a map, an understanding of contour lines is essential. This knowledge is the foundation when it comes to triangulating your location, orientating your map, working out how long it will take to get from A to B and generally visualising the 2D map in front of you as a 3D landscape.
After a bit of practice, you’ll start to notice what contour features look like. Towards the top of a mountain or hill, you’ll notice progressively smaller loops of contours, as the terrain reaches a peak. In a V-shaped valley, you’ll see the same V-shape represented in the lines. For a narrow ridge, you’ll see tightly stacked, parallel contour lines falling away on either side of the crest. The more you get out there with a proper topographical map, the better you’ll be at translating the map to the landscape, and vice versa.

As you learn navigation, you’ll develop an appreciation for looking at the journey ahead on the map and visualising what to expect. Contour lines help you to form this picture of the journey in your mind, helping you to stay on the right course.
Using contour lines to triangulate
Here’s something to remember, contours are king. Contour lines are more important than any other feature when you are trying to work out where you are on the map. It’s tempting to look for the path you are on, or for the stream that's merrily trickling by alongside you, or the drystone wall that’s cutting across in front of your path, or the forest in the valley below. Before considering any of these, and before you consult your map or go anywhere near your best compass, first take a look around and work out what the land around you is doing and what that will mean for the contours you’d expect to see on your map.
We rely first and foremost on contours because we live in an impermanent world. Streams alter course, new paths are built, trees are blown over, forests are cleared, new woodland is planted, roads are washed away in floods, etc etc. Due to this, maps go out of date. It’s also easy to mistake one path for another on a map, or pick out the wrong forest, or think you’re crossing one stream when actually you are crossing another.

The most permanent and unique feature of the land is its shape, which – after a little practice – you can almost always match to the lines on your map. When learning how to triangulate, it is the most essential skill. Of course, even the shape of the land isn’t permanent, but it is the most reliable measure we have.
So, when it comes to working out where you are on the map, look at what the land is doing immediately around you and what you can see in the middle distance. Match this to the contours of your map and then – and only then – start to think about using other natural features like streams and forests to confirm your judgement. Human features, like paths, roads, walls and buildings, should be your last port of call when it comes to triangulation, as they are the least permanent.
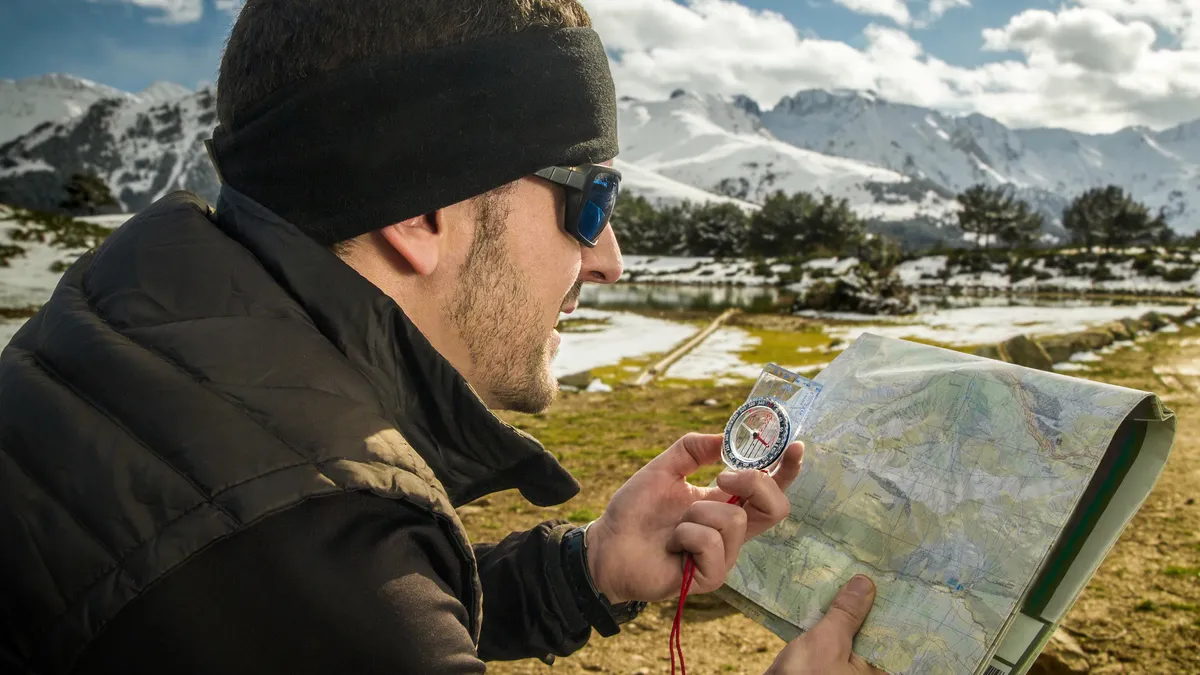
Once you’re sure you know where you are, it’s useful to know how to orientate a map. By matching near and distant features based on their contours, you can turn your map so that it is orientated to your surroundings.
Using contour lines to estimate how long it will take to get from A to B
Timing is a crucial part of navigation. After all, you don’t want to be still on the hill when you’re supposed to have a reservation at a restaurant in the valley. Or worse still, you don’t want to be on dangerous ground when it gets dark without a headlamp (see our guide to the best headlamps for some good options).
With this in mind, it’s useful to be able to estimate how long it will take to get from one point to another. This is relatively easy on flat ground but more complicated when ascending mountainous terrain. Fortunately, there’s a handy rule you can use when ascending a slope to make accurate predictions: Naismith’s rule. Developed by Scottish mountaineer William W. Naismith in 1892, it is a practical way to estimate timings and average hiking speed when hillwalking.

Everyone hikes at a different speed, usually between 3 to 5km an hour. Let’s take an average of about 4km per hour. If point A is 4km away from point B, it would take you an hour to walk between them along flat terrain. However, let’s say point B is a summit, entailing quite a lot of elevation gain to attain. Naismith’s rule says that you should add 10 minutes for every 100 meters of elevation gain to arrive at an estimate for how long it will take you.
So, if you were ascending a 1,200-meter mountain from sea level and its summit was 2 km away, you would first consider the distance. Hiking at 4km an hour, it would take you 30 minutes to cover 2 km on flat ground. Now we need to consider the 1,200 meter ascent. Remember, we add 10 minutes for every 100 meters of elevation gain, which means 10 minutes multiplied by 12, as there's 1,200 meters to account for. 10 minutes multiplied by 12 is 120 minutes which, when added to the 30 minutes for the distance covered, gives you a 150-minute estimate to reach the summit.
Two hours and a half to the summit, means a there-and-back of around five hours in all likelihood. Best not set off at six in the evening, then.

Getting to grips with applying Naismith’s Rule to yourself takes a bit of practice, as everyone ascends at a different pace. As well as this, Naismith’s is more suited to steep ascents rather than steep descents, but the same principles can be applied with a bit of experience. Eventually, you can adjust it to fit your hiking style, giving you a reliable way of estimating timings.
The origins of contour lines
Contour lines were first used in 1584 to represent the depth of the River Spaarne in the Netherlands by Dutchman Pieter Bruinsz. The idea didn’t catch on until the 18th-century, though the lines were still primarily used for representing the depth of water features. The first recorded use of contours to represent land was by Italian Domenico Vandelli on a map of the Duchy of Modena and Reggio in 1746.
For the first time contour lines were used on a mountain, let me take you back to 1774, to a distinctively pointy and isolated mountain in the Southeast Highlands of Scotland called Schiehallion. There, Astronomer Royal Nevil Maskelyne was attempting a groundbreaking experiment to calculate the mean density of the Earth. His theory was that Schiehallion’s mass, as a portion the planet’s total, would have a discernible gravitational effect on nearby objects. By comparing this to the gravity of the entire planet, he arrived at an approximate result for the mass of the Earth, which has since been proved to be relatively accurate.

However, before he could do this, he first had to learn Schiehallion’s approximate mass and he tasked colleague Charles Hutton with calculating it. Hutton had the idea of interpolating a series of lines at set intervals that marked equal points of height around the mountain in order to do this. The result was the first use of contour lines to model a mountain’s form, an approach that has since become the standard way to show the shape of the land on a topographical map.

