
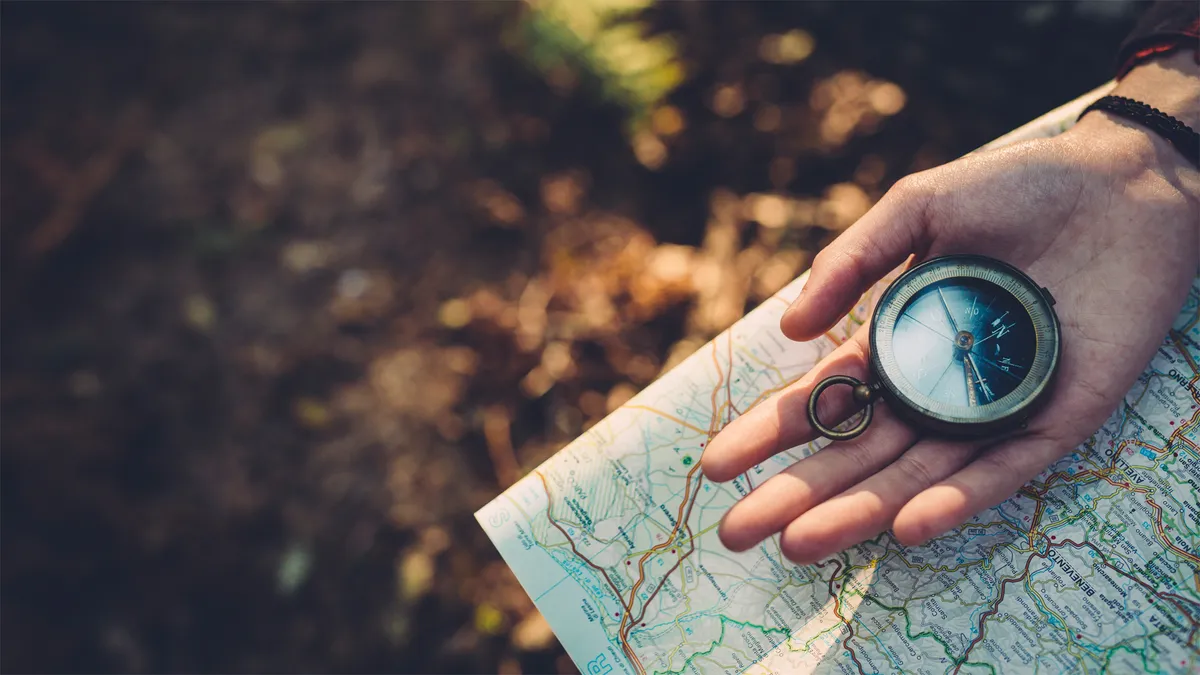
Knowing how to read a map is an immensely satisfying experience. However, it takes patience, practice and effort to reach a level where you’re yomping around like an explorer of old.
There are four key elements to reading a map:
We'll walk you through each of these stages so you're prepared for your next adventure, and can safely find your way.

Despite the increasing accuracy of the best GPS watches and handheld GPS devices, there’s still no real substitute for knowing how to read a map and how to use a compass. Batteries can run down, screens can break, and sometimes you just can't get a GPS signal, particularly close to cliffs or under dense tree cover.
Developing your navigation skills in turn gives you an appreciation for the lay of the land and enhances your wilderness survival skills. Put it this way, learning to utilize a map and compass develops you as an adventurer, while a reliance on technology actually deskills you.
Technology is also fallible. Cold can wipe your device’s battery out with alarming speed, rendering you unable to navigate. Drop or lose your device and you might have the same problem. We know what you’re thinking, people are fallible too and can make mistakes when pinpointing their current location, for example. That’s why, when you hit the trails in your hiking boots, we’d always recommend you take a map and compass, as well as a hiking app or GPS device as a back up, just in case.
Choosing the right map
Choose the right type of map
For hiking and other outdoor adventures, you will need a proper topographical map, produced by cartographers to a clearly identified scale. Topographical maps show detailed information on the nature of the terrain, roads, footpaths and - crucially - the gradients.
A tourist map may not necessarily be to scale and won't contain all the features you need. Meanwhile, a road map will be to scale but will be so focussed on human features, such as roads, towns and cities, that it won't give you the information you require to be able to read the landscape.

Choose the right scale
Topographical maps come in a range of scales, such as the excellent 1:25,000 and 1:50,000 maps produced by Ordnance Survey in Britain, or the 1:24,000 maps produced by the United States Geological Survey in America. The larger the scale, the smaller the area that is covered by the map, which is slightly counterintuitive.
So, a 1:25,000 map is a large scale map and shows a smaller area in more detail and a 1:50,000 map is a smaller scale map and shows a larger area in less detail.
Small scale maps (1:50,000 or 1:40,000)

If you are going to be moving quickly across the landscape and covering a large distance — on a long trail run, for example — the detail offered by a 1:50,000 or 1:40,000 map should be sufficient. The last thing you want to be doing is constantly running off the edge of your map sheet. Other times you might want a larger scale map is on a multi-day expedition or when cycling. It's preferable to have everywhere you're expecting to go on one map rather than having to bring two or three along.
On a 1:50,000 map, 1cm is 50,000cm in real life, so 1cm equals 500 metres, and 2cm is 1,000 metres (1km). If you look closely, you'll notice that a topographical map is divided into grid squares. These squares represent 1km squared, so because on a 1:50,000 map 2cm = 1 km, each grid square is 2cm X 2cm.
Large scale maps (1:25,000 or 1:24:000)

For day hikes and more precise navigation, you'll want a smaller scale map in your day pack. The level of detail is greater, with more individual features allowing for a greater degree of accuracy when you're finding your way from A to B. For activities like night walking, you will definitely want a smaller scale map.
A 1:25,000 scale means 1cm on the map equates to 25,000cm on the ground (so 250 meters); therefore 4cm on the map equals 1000 meters (1km). So, the grid squares on a 1:25,000 map are 4cm X 4cm and represent 1 km squared.
Understanding map symbols
At first glance, it can be overwhelming trying to work out what the various lines and symbols mean, as there is an awful lot of information to take in and you might wonder if you’ll ever learn how to read a map. However, take a breath, consult the legend (sometimes called the key) and you will discover what the colored icons, symbols and lines represent.

Most maps use symbols and abbreviations, rather than descriptions, to show where things are. This is to avoid the map being crowded with writing, making it harder to read. The key as to how to read a map is exactly that: a key. Also known as a legend, the key sits in the corner of the map for you to refer to and tells you what the different symbols mean so that you know what you are looking at. Of course, different map brands in different countries have different colour codes and symbols, so it's good to familiarise yourself with the brand you are using.
Paths
Arguably most important to many map readers are the lines that indicate a public right of way or footpath and trails that you can both walk and ride (on a horse or a bicycle). Remember, though, just because a path looks clear on a map, it won’t necessarily be obvious on the ground, so keep checking your map to see whether you’re passing the landmarks that indicate you’re on the right track. It's worth also bearing in mind that paths may exist that are not indicated on your map.
Symbols and abbreviations
Symbols and abbreviations range from the essential – public toilet icons, little tent symbols signifying camping areas, and footbridge icons, denoting where you can cross rivers and streams – to the very useful: picnic spots, good viewing points and places to eat and drink. Brits often scour their OS Maps looking for PH, which means Public House (pub), for when they want to know where the nearest place is to get a beer!

Likewise, knowing the difference between various symbols can be really helpful when navigating through different types of terrain, such as different varieties of woodland. Pine plantations may be represented by icons looking somewhat Christmassy, whilst mixed woodland might be represented by a bushier, broccoli-esque icon. Once you know these details, you can often work out if you are where you think you are by the flora around you.
Contour lines
Contour lines are squiggly lines, with numbers next to them. The lines represent the contours (shape) of the land, and the numbers tell you the height each line is above sea level. The closer together the contour lines are, the steeper the slope. If a contour line is pointing in a ‘v’ shape and they look close together, this will suggest a narrow slope that is steep, also known as a spur. The inverse of this (a clump of lines in a roof, or ‘n’ shape) might signify a decrease in the height – often water features are found here, due to the slope aspect. These are known as re-entrants.
Whether you’re a basic hill navigator or a seasoned pro, contours are incredibly useful when planning a route, as you can get a good picture of how steep it will be and prepare accordingly. The land's contours are the most fixed aspect of a landscape. Trees can be cut down, new paths can be built and old ones become overgrown, walls can be dismantled and streams can change course. What this means is, contours are the most reliable features on your map and the first thing you should use to determine where you are (more on that later).

If you are in a relatively flat area and see a clump of orange contour lines ahead, you know to expect some steep hills that require a tough ascent. Seeing spaced out contour lines indicates flatter land, which can also help you plan where you are going to pitch your best one-person tent for the night.
On most maps, the interval between contours is usually 5 meters, but in mountainous regions, it may be 10 meters. This can be checked against the legend. Contours can quickly reveal if the area planned will require a longer time to walk around. As a rule of thumb, for every 10 meters of height climbed, it’s worth adding on an additional minute of expected walking time.
For a short snippet of history on the origins of contour lines, take a look towards the end of this guide.

Relating the map to the land
Figuring out where you are on a map is the bread and butter of navigation and this is where people can go wrong and end up in the wrong valley. It's a bit like being a detective, using the clues that the land gives you to pinpoint where you are on the map. The temptation is to rush here, but it's much better to be absolutely sure of your location by using as many clues as you can.
Use the contours
To begin, take a good look around and read the land as much as you can, before even looking at your map. As previously mentioned, contours are the most fixed aspect of the landscape and this is the first thing you should look for. What is the land doing around you? Are you on a steep slope or a flat plateau? What is the land doing ahead of you? Behind you? To your right? To your left? Now, see if you can match these up to the contour lines on your map.

Look for natural features
Okay, you've got a sense of what the shape of the land is doing in terms of contours. Next, you can start to look for other natural features. Are there any obvious natural features visible? Crags, Streams, lakes, waterfalls and forested areas are all good things to look for next and then compare them to the map once again.
Look for human features
Human features like buildings, paths, walls and fences are the last thing you should use, as they are more liable to change. However, now you should be getting fairly confident of where you are based on the natural features around you, so you can use the human features to complement these. Like a detective, you will have gathered all of your clues and almost be ready to reveal to your friends that you are a master of deduction, pinpointing exactly where you are on the map...
Use your approximate elevation
One last trick is using the approximate elevation of features around you to solidify your judgement of where you are on the map. If you can see that you are broadly level with an adjacent summit or ridge line, you can use the contour lines on your map to work out how high you are and compare this to the elevation of your perceived location on the map.
Orientating your map
Once you're confident you know where you are, you can set (or orientate) your map using features around you. It's a bit like imagining you are jumping into your map. It involves getting the map to face the same way as you are by looking down it from your perceived location so that features that are ahead of you line up with their representation on the map.
For example, if there's a prominent summit ahead of you, you can hold your map in front of you so that you are facing the summit physically and on the map too. Then you can check other features on either side to check that they match up.
Other factors to consider
Used correctly, a map can allow you to accurately plan a journey, giving a good idea of landmarks and features you will pass along the route, as well as how far you will be traveling. Adding compass skills will bring extra value to your map too.
It is always worth owning a map if you are likely to be returning to an area over and over again – there’s nothing more exciting than pouring over a paper map in the comfort of your own home, planning a new adventure. Generally, you can get hold of individual maps that cover particular areas. National Parks and popular hiking regions are usually extremely well catered for.
Of course, paper maps do eventually become dated, with new roads being built or areas suffering erosion and footpaths falling into the sea. Digital mapping software allows you to print up-to-date maps to scale and make multiple copies, which is useful for hillwalkers who want flexibility with their plans. The main mapmakers mentioned above all have digital platforms and they rank among the best navigation apps available.
Grid references
As a child at school, you'll have learnt all about co-ordinates and grid references, finding treasure on treasure maps or playing Battleships. In fact, you'll find that kids love maps. Teaching them your map reading skills is a great way to get them involved and keep them entertained on your family hike...
Any map you'll use in the outdoors is covered in faint lines, which make up a grid. Each grid square will measure a set area, and they have associated numbers, running horizontally and vertically along the edges of the map. These numbers are what you use to pinpoint your location on a map. This is useful for giving people directions to a remote camp spot, for example, or in an emergency to relay your location to mountain rescue.
To take a grid reference, remember the useful phrase: ‘along the corridor and up the stairs’. The first numbers you quote are the ones that run along the bottom of the map, from left to right – the ‘Eastings’. The second block of numbers you should quote are the ones read from bottom to top, known as ‘Northings’.
Four-figure grid references identify a single square on a map, and six-figure grid references (when you use the smaller incremental 1-10 markings between the numbers) identify a smaller square, which should be sufficient for anyone to locate the spot you’re talking about.
Latitude and longitude
Latitude and longitude are global addresses, written in numbers so that everyone can use them regardless of where they are. These are the numbers you see when you click on ‘Your Location’ on Google maps, and they give a very accurate reference point to where you are. They are given as coordinates, made from horizontal lines, with the equator referring to 0 latitude, and vertical lines, with the line passing through the prime meridian referring to 0 longitude. It’s worth noting that some international maps don’t use grid references, but use latitude and longitude only.

Carrying a back-up
Finally, for those who wish to master the art of becoming a navigation pro, get practising and remember to carry a spare form of navigation in case one fails – for those in mountainous regions it’s worth carrying a spare map and compass separate to your main tools.
If you are also using digital mapping on your phone, it's a good idea to bring a portable charger or a solar charger, so that if your battery dies, you can charge it back up. Just don't forget the cable!
Hiking in Britain: should you use Ordnance Survey or Harvey?
The two mainstays for hikers in Britain are Ordnance Survey (OS) and Harvey.
Ordnance Survey are the national mapping agency of Great Britain and are very much pioneers in the field. It was Ordnance Survey who built triangulation pillars on high ground across the nation. This was in order to calculate the height of the land at various points. Their Explorer series is immensely popular with those heading into the British countryside. The usual scale for OS Maps are 1:25,000 and 1:50,000, though larger scale maps are available.
However, OS Maps are designed for general use. A popular alternative to Ordnance Survey is Harvey, which are designed specifically with hikers and mountaineers in mind. They are waterproof as standard and show the intricacies of terrain in more detail than OS Maps. Maps are available at 1:25,000, 1:30,000 and 1:40,000 scale.
So if you’re off to do the best walks in the Lake District, an OS map should suit you just fine. However, if you are traversing more technical ground, like the rocky terrain of the Isle of Skye’s Cuillin Munros, then Harvey could be the best bet.
Common map reading mistakes
Hidden or indistinct footpaths
Most maps will show when the footpath or right of way changes. If the green dotted line suddenly appears on one side of a solid black line before switching to the other side, this might mean there is a wall that needs to be crossed, which will either have some kind of signpost or small steps built-in. When walking across areas with multiple paths, keep track of which path you are walking on. For more on this, see types of hiking trails.
Confusing boundary lines, paths and footpaths
People can often misinterpret a boundary line for a path or footpath or vice versa when looking at a map. Boundary lines are sometimes old drystone walls, or disused fences, or may not exist at all. It’s important to recognize what this looks like so you don’t end up looking for a footpath that doesn’t exist when out on a walk. Check the map legend carefully
Walking while holding your compass
Walking a few paces sideways can throw your compass off course, even though you are still walking in the right direction. Magnetic interference from mobile phones and electronics can also affect the signal. Also walking whilst holding a compass can distract you from looking out for danger. It’s best to line your compass up with something in the distance and head towards that.
Selecting a moving object to walk towards
It’s best to be walking towards something in the distance that is not likely to move, such as a distinctive rocky outcrop, a trig point, a significant peak or church spire. In poor visibility, it is easy to mistake a sheep for a rock!
Not taking magnetic variation into account
Make sure you check for magnetic variation in the area you’re exploring and take it into account when lining up your compass. The magnetic variation will be printed on the map. In fact, a region's geology can affect your compass needle. The gabbro rock of the Isle of Skye in Scotland is notorious for throwing your compass completely out.
Not trusting your compass
If you think your compass is pointing you in the wrong direction, then start again to work out your direction. Check the compass hasn’t become de-magnetized, which is usually when a compass has been exposed to a battery or a torch. If it says the same direction again, then trust it – usually, it is right, and your sense of direction is wrong.
Top tip
Make sure you look after your maps by putting them in a clear map case, which helps prolong their lifespan and readability. OS Explorer maps are simple paper maps that can be cost-effective, while OS Active maps are slightly more expensive, plastic-coated maps that are water-resistant and can be much tougher and longer-lasting. Harvey maps are also water-resistant and are very lightweight.

