
Yosemite National Park is home to an abundance of iconic, bucket list sights, among them the majestic cliff face known as El Capitan, plunging Yosemite Falls and the mighty head of Half Dome surveying the valley from the east. Half Dome is visible from many points in the park that don’t involve a major hike, including from the famous Tunnel View and perfectly reflected in the surface of Tenaya Creek in the springtime, but if you’re curious about getting to the top of it, you’re not alone. In fact, this magnificent hunk of rock attracts about 50,000 hikers each year, but that certainly doesn’t mean it’s easy. Our guide to hiking Half Dome in Yosemite won’t get you to the top, by any means, but it will give you an overview of how to prepare and what to expect from this fearsome hike.
What is Half Dome?

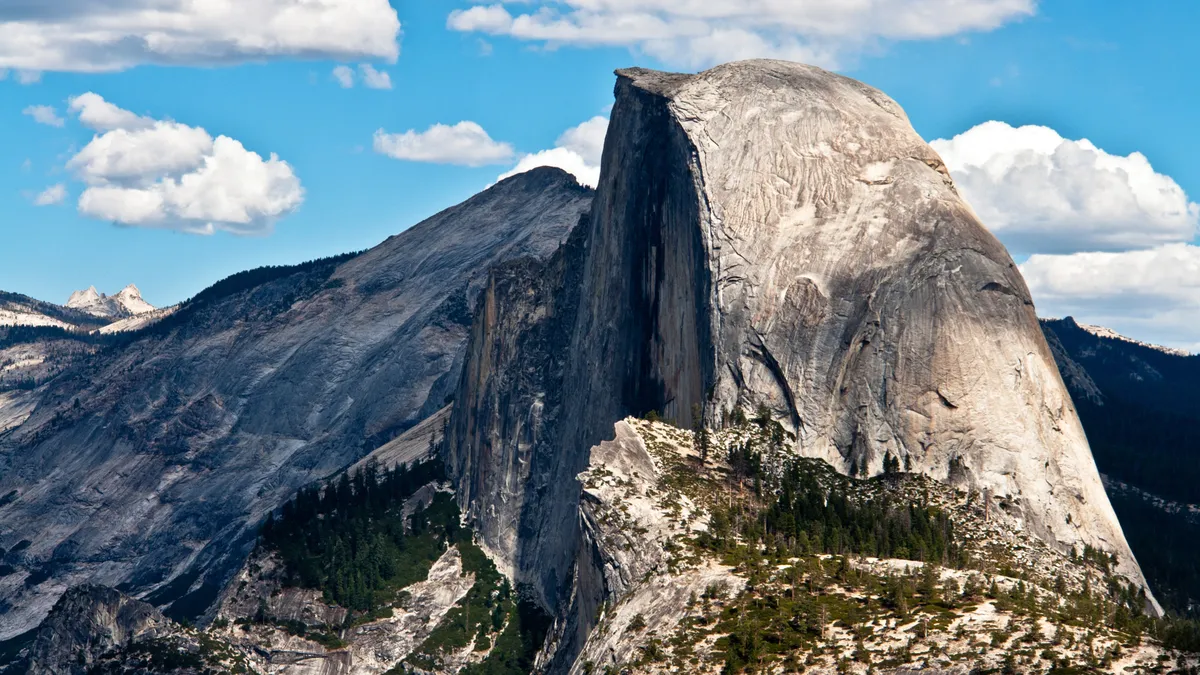
Half Dome is an impressive granite rock formation that dominates the eastern end of Yosemite Valley. One side of it is a sheer face while the other three sides are a smooth, round formation, giving the appearance of a rock dome that has been sliced in half – this impression is an illusion, however, and while some of the original rock formation was shaved away by passing glaciers millions of years ago, geologists do not think that the original shape was twice as large as what remains today.
What’s so special about Half Dome?

Half Dome is one of many domes in Yosemite – in fact, the park has dozens of rock domes, more than any other place on earth – but it is by far the best known. Its distinctive appearance is one of the landmark spectacles in Yosemite National Park and it stands at a whopping 8,842ft above sea level, even higher than its neighbor El Capitan. It was originally named 'Tis-sa-ack', meaning Cleft Rock, by the native Ahwahneechee people who are said to see the face of a woman in its rock face.

Half Dome’s unusually sheer, smooth pitches have inspired climbers, pioneers, artists and outdoor gear companies for centuries. The first known ascent of Half Dome took place in 1875 by George G Anderson, who drilled bolts into the eastern face. Conservationist John Muir followed in his footsteps shortly afterwards, that same year. Famed landscape photographer Ansel Adams took many of his legendary images of and from Half Dome, and his ashes would later be scattered on its slopes. Finally, the shape of Half Dome was the inspiration for The North Face’s iconic logo.
How hard is it to hike Half Dome?
You can hike Half Dome in a day, but don’t expect it to be a cakewalk. Most people hike Half Dome from the Mist Trail, one of the best hikes in Yosemite that takes you first to splendid Vernal Falls, then to stunning Nevada Falls. For most people, the hike to Nevada Falls on its own makes for a challenging enough dayhike, but at that point you’re still not even halfway to the top of Half Dome.
The total hike to Half Dome involves about 14 miles roundtrip on foot – 16 if you count the walk from the parking lot to the trailhead. As such, many people opt to break the hike up over two days and camp at Little Yosemite backpacking campground, an hour beyond Nevada Falls. In addition to its length, the hike gains almost 5,000ft in elevation, making it incredibly steep.
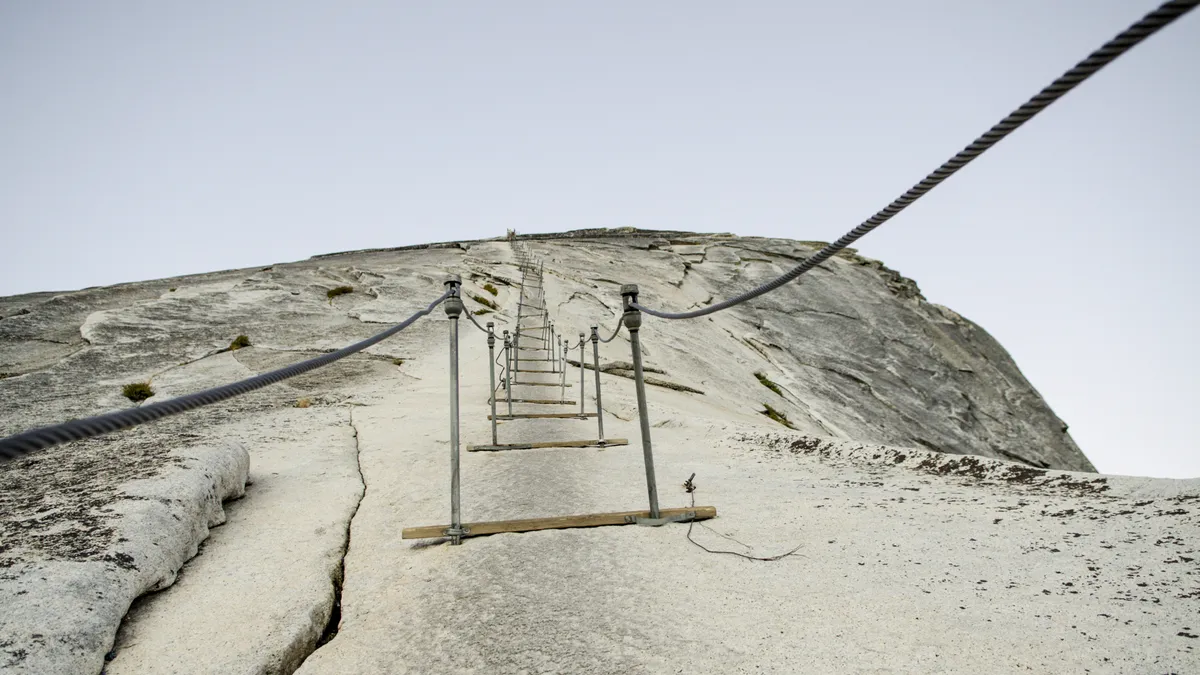
The surface is smooth granite that becomes treacherous when wet, and the final steep climb to the top requires the use of cables which are bolted into the rock. Hikers have unfortunately died from falls on this part of the trail, and its exposed nature makes it especially dangerous during lightning storms. Needless to say (but we’ll say it anyway because it’s important), hiking Half Dome is not recommended for beginners or anyone who is out of shape.
Do you need a permit to hike Half Dome?

Hiking Half Dome has become increasingly popular, with so many people attempting the climb that dangerous delays and bottlenecks were occurring routinely on the single file Cable Route section. Consequently, since 2012, you have needed a permit to hike Half Dome. The National Parks Service issues 300 permits per day – 225 for dayhikes and 75 for backpacking. Permits are required seven days a week when the cables are up – usually from Memorial Day to Columbus Day – and permits for day hikers are distributed by lottery via Recreation.gov, with a preseason lottery in March and daily lotteries during hiking season. Backpackers need to apply for a separate permit along with their wilderness permit.
Hiking Half Dome: what to expect
If you’ve obtained a permit to hike Half Dome, the most important thing to do is check the weather forecast before you go. If there are storms predicted, you should not attempt Half Dome as it is simply too dangerous. Upon arriving at the park and again on the day of your planned hike, you should talk to park rangers about current conditions and what to expect. In addition, here are some other considerations to take and details of what you might expect on the day.
Timing
For a long, difficult hike such as this, you should plan to leave early – around sunrise or perhaps even earlier. Expect the hike to take between 10 and 12 hours, and set a time at which you’ll turn back, even if you haven’t reached the top – you don’t want to get stuck up there at night.
Getting there
The nearest parking is at Curry Village, about a mile away from the trail along a flat, shaded road, or you can take the shuttle to Happy Isles Nature Center.
What to wear
For a hike such as this, it’s crucial to wear proper hiking boots with good tread that you’ve already broken in, and not running shoes. Hiking season in Yosemite often involves mild, dry weather, but you’ll want to dress in breathable, quick drying layers and carry a waterproof jacket for the waterfalls as well as rain and a warm layer like a fleece or down jacket since you’ll be hiking at high altitude where the temperatures are cooler.
What to bring
It’s vital to bring enough water – a gallon is recommended – and the last place with potable water is at the bridge crossing below Vernal Falls. If you have a water purifier, Little Yosemite Valley is the last place to refill.
You’ll also need to carry enough food for the day. You can buy provisions at Curry Village, but you’ll probably need to do so the day before, since the shops and restaurants won’t be open before sunrise.
You should also carry a headlamp – the length and difficulty of this hike mean that hikers are frequently beginning and descending in the dark, and you don’t want to be caught out without a light source.
Consider also using trekking poles to help your knees on the downhill, but make sure they can fold away in your backpack for the cable section as you’ll need both hands free.
The trail

The rocky Mist Trail starts out steeply alongside the mighty Merced River as it roars over granite ledges, offering frequent glimpses of Half Dome on the way. The first part of the trail is paved until you reach the bridge, where there are toilets and drinking water. As you start to climb up alongside Vernal Falls about 1.5 miles in, you’ll want waterproof gear for the strong spray during the exhilarating single file section cut into the rock face that requires focus and holding on to the ropes.
Pause at the top of Vernal Falls, where you can relax on giant rock slabs and watch the water tumbling out of view, then carry on going to Nevada Falls which is about two more miles in. The crowds after Vernal Falls thin out considerably and Nevada Falls is another magnificent Yosemite standout that is worth the steps.
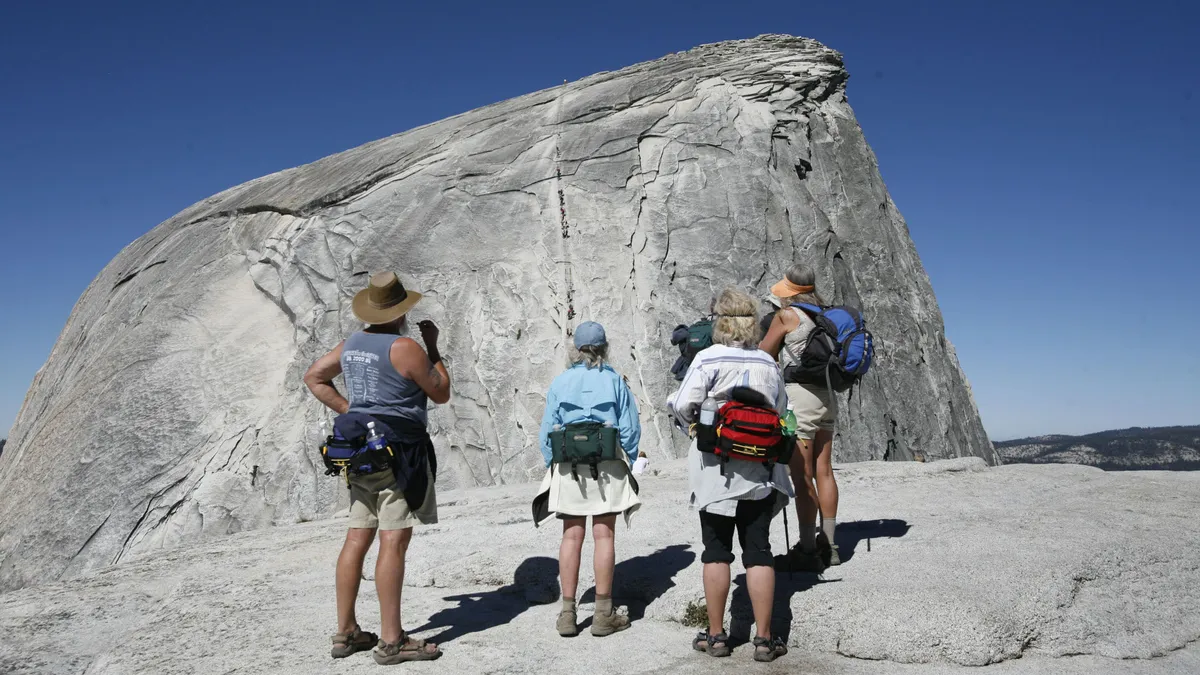
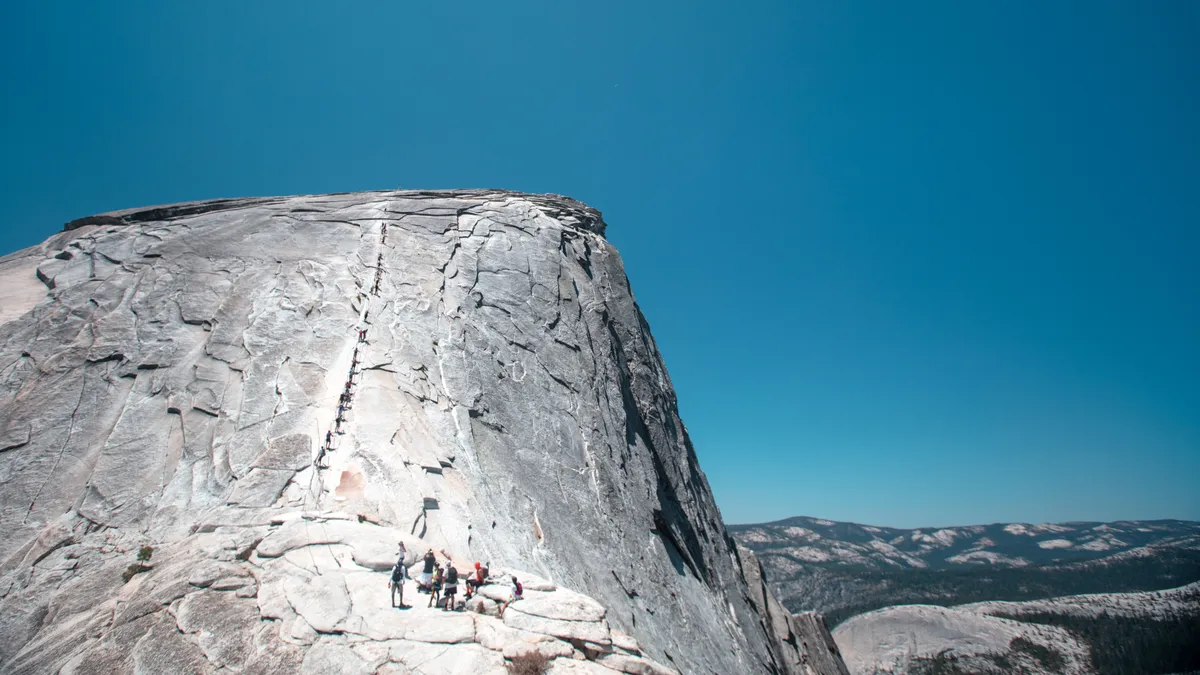
After this, there’s a long sandy section through Little Yosemite Valley where you can camp if you have the permits and the gear. Hike through the wilderness for four more miles until you reach the sub Dome, which requires a steep climb up to the cables. Here, you might start to notice the effects of high altitude hiking, and soon you’ll be exposed as you will be above treeline so make sure to pay attention to the skies.
Climb the sub Dome to the cables where you’ll have to wait your turn to begin the hair-raising climb to the top – after all, there will be about 299 other people up here with you. On the cables section, take your time and pay close attention to what you’re doing.
At the top, you’ll find a broad surface to rest on and enjoy unparalleled views of Yosemite – however, here you’re only half way! You still need to return the way you came, and descending the cables is more difficult than climbing them. You’ll want to reach the top early and have ample time to recover and plenty of food and water to fuel your return journey.

