How to choose a backpack: for casual day hikes, epic thru-hikes, and everything in between
Our guide on how to choose a backpack offers advice on sizing, fitting, waterproofing, and all the features that contribute to a pack’s convenience, comfort, and practicality

Choosing a backpack for hiking or backpack is not a decision to be taken lightly. Not only will this piece of gear be responsible for safe storage of all your other pricey hiking and camping kit, it also impacts trail-time comfort levels more than almost any other piece of kit.
Knowing this, of course, makes the decision-making process all the weightier, but our guide on how to choose a backpack will guide you safely through all the possible pitfalls and provide all the info you need to pick the best hiking backpack or best daypack for all adventure types, body shapes, and trip lengths.
How to choose a backpack: features, attributes, and design characteristics to consider when buying
Let’s start with the key take-home from what follows – there’s no perfect backpack for everyone and choosing the ideal model for your needs will depend on what you’re doing, where and when you’re doing it, and the duration of your trip.
Capacity
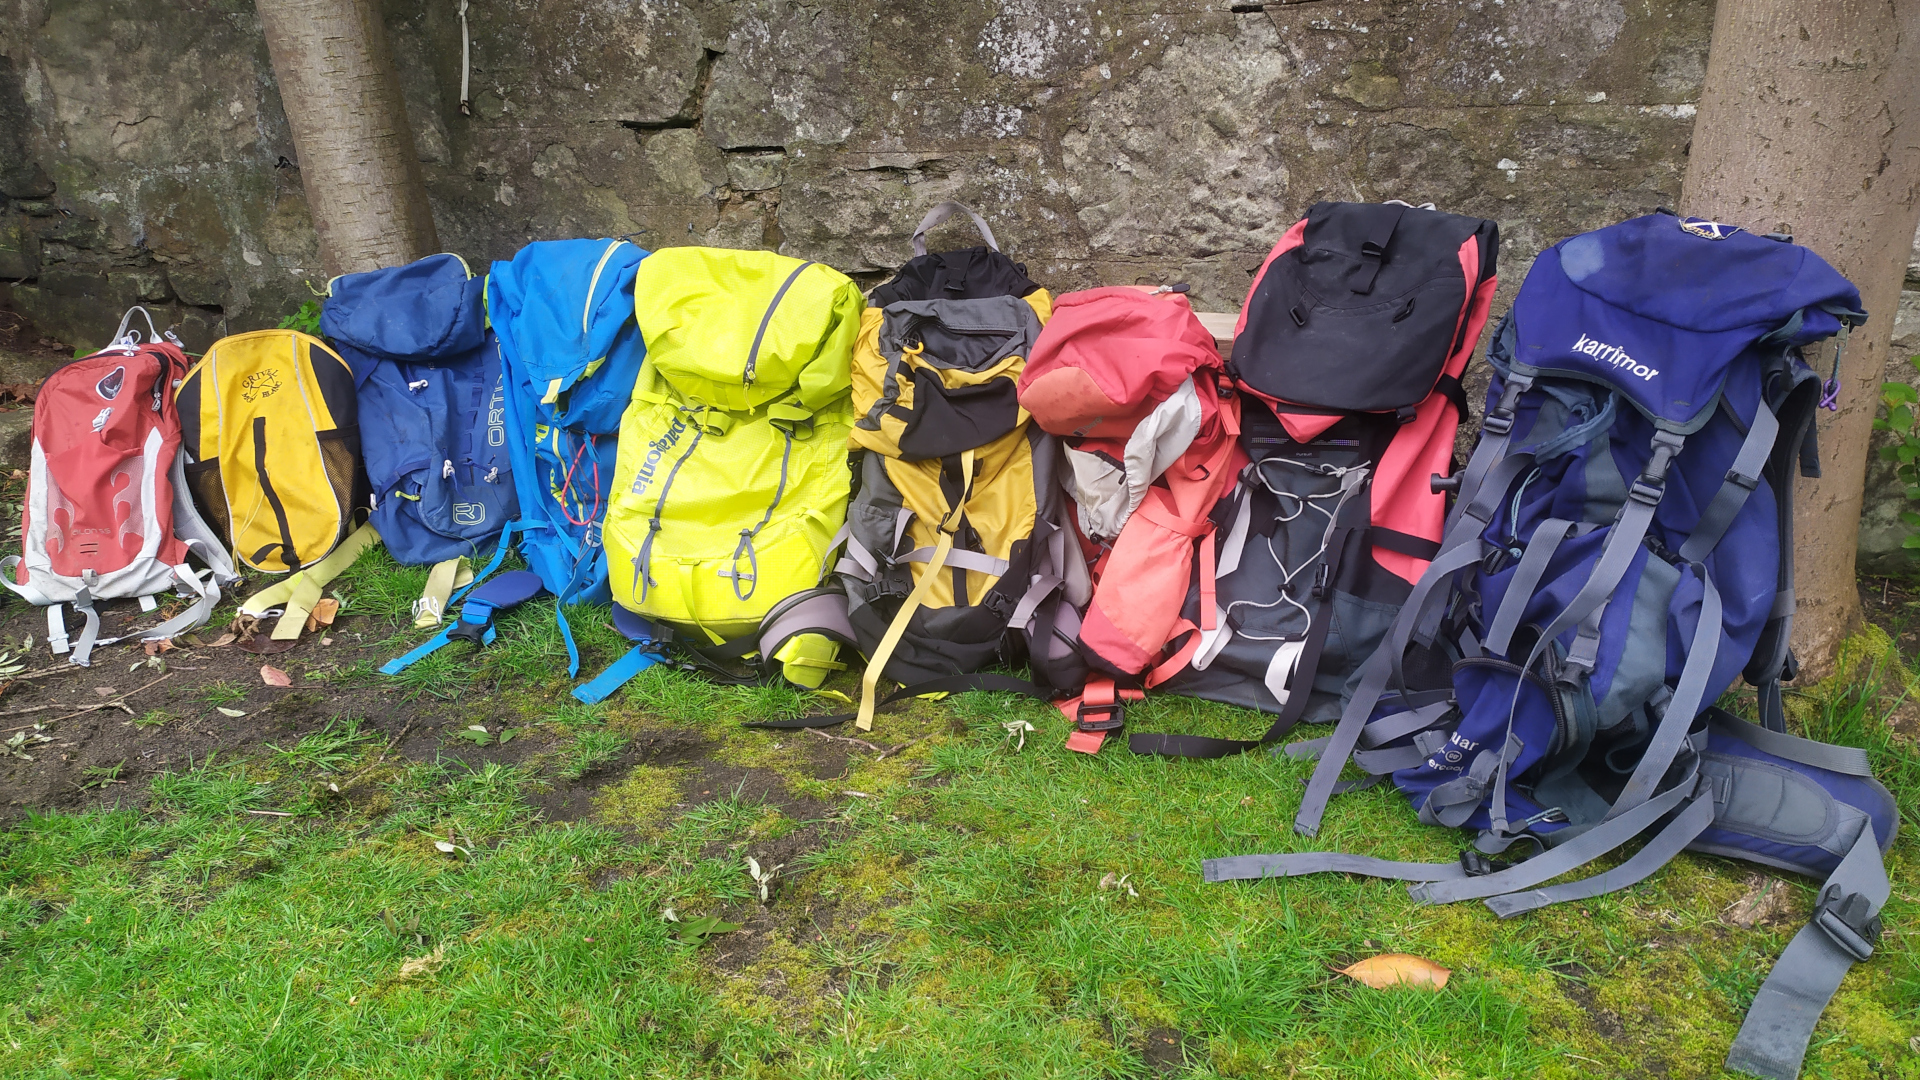
The capacity of pack you’ll need is directly related to the duration of your trips. While a few other variables can come into play (more on these in what size backpack do I need?), how long you plan on spending on the trail is the main factor to take into consideration.
Below, we’ve added a quick, at-a-glance guide to the backpack capacity you should need for different trip durations in 2/3-season conditions:
Trip duration Backpack capacity in liters
Day hike 15 – 25
All the latest inspiration, tips and guides to help you plan your next Advnture!
Overnight (1 night) 25 – 40
Weekend (2 nights) 40 – 50
Multi-day (3-5 nights) 50 – 65
Extended trips (5+ nights) 65+
Bear in mind, however, that if you’re hiking in winter, with your kids, or carrying any technical gear (for via ferrata or scrambling, for example) you may need to plump for a bigger pack to accommodate all your gear. For help with doing this, check out our guide on how to pack a backpack.

Weight
Your backpack is one of the heaviest pieces of kit you’ll be carrying on any trip, whether that be a day hike or a multi-day thru-hike. Sadly, there’s usually a trade-off between weight and comfort and convenience. Heavy external frame backpacks used to be commonplace, but these days lighter internal frame backpacks are the norm, featuring form hugging frames that you don't really notice.
As a general rule, the more cushioning and features a pack possesses, the heavier the pack will be, while minimalist models that are blessed with very little in the way of padding and added features are usually the lightest. Choosing the perfect pack for you, then, will ultimately come down to deciding how much you’re willing to compromise on comfort in order to shave off a few ounces from the overall weight of your load.
Our advice? Take time to figure out what size of pack you need to avoid carrying dead weight in a pack that’s bigger than you need, and don’t sacrifice comfort to save a few ounces that could possibly be shaved off your load elsewhere.
Sizing
If you have a well-fitted backpack, you’re 90% of the way towards having a comfortable backpack, so sizing is absolutely critical. Suitably sized and fitted backpacks ensure that the load is distributed in a way conducive to comfort – with roughly 80% of the load on your hips and only 20% on the front (not the top) of your shoulders. This distribution radio allows the stronger muscles in your lower body to support the weight while taking the strain off your torso and shoulders.
But how to find a backpack that fits? If you’re buying in a store, most will be able to help you with fitting. If buying online, measure from the C7 vertebra at the base of the neck (the one that protrudes when you bend your neck forwards) to your iliac crest (roughly the center point on your spine between the top of your hip bones). Once you’ve taken this measurement, locate the sizing chart for the backpack you’ve got your eye on (most brands include these) to check if it will be a good fit. It’s worth noting that the best women’s hiking backpacks are tailored specifically to the female form, with shorter back panels and suitably placed shoulder, chest, and waist straps.
Comfort
As with the best hiking shoes and best hiking boots, when choosing a backpack, comfort should be very near the top of your list of must-have attributes. If this means choosing a backpack that’s heavier, uglier, or pricier than you’d ideally like, we’d recommend bite the bullet – an uncomfortable backpack, after all, is one destined to turn every hike you wear it on into a sufferfest to be endured rather than an outing to be enjoyed.
But how to choose a backpack that will be comfortable on the trail?
Well, the best way to gauge a pack’s comfort level is to simulate trail-time carrying as best you can before you commit to buying. This can be done in a store by loading it up with gear and taking a few jaunts up and down the stairs, or at home by taking it on a few short hikes around the neighborhood or in a local park - we’d recommend putting a rain cover over it to protect against scrapes, rain, and bird poo just in case you decide to send it back.

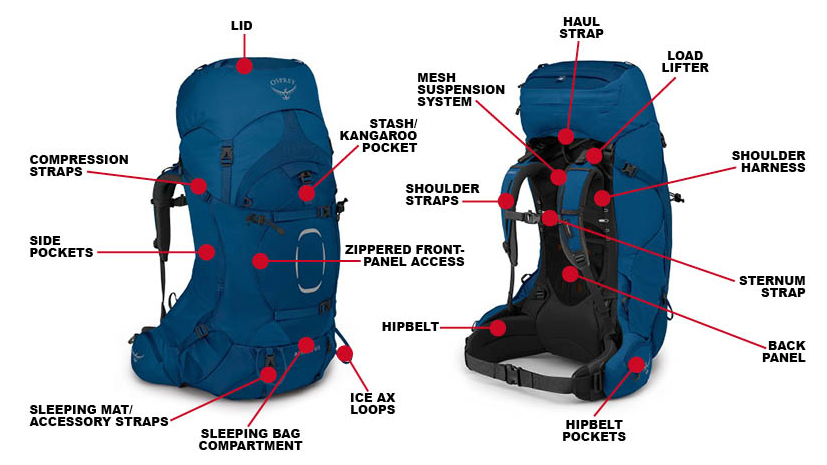
Because short-lived trials are unlikely to give you a true feel for how comfortable a pack will be on longer hikes, though, you should also pay close attention to the following features (you’ll find all backpack features in our guide to the parts of a backpack) when buying:
Shoulder straps
These should be nicely padded and adjustable – this allows you to move them higher or lower to suit your torso length.
Back panel
Whether a pack uses a mesh suspension system or molded foam, this should provide plenty of airflow between your back and the material of the backpack, otherwise you’ll overheat and become drenched in sweat.
Hipbelt
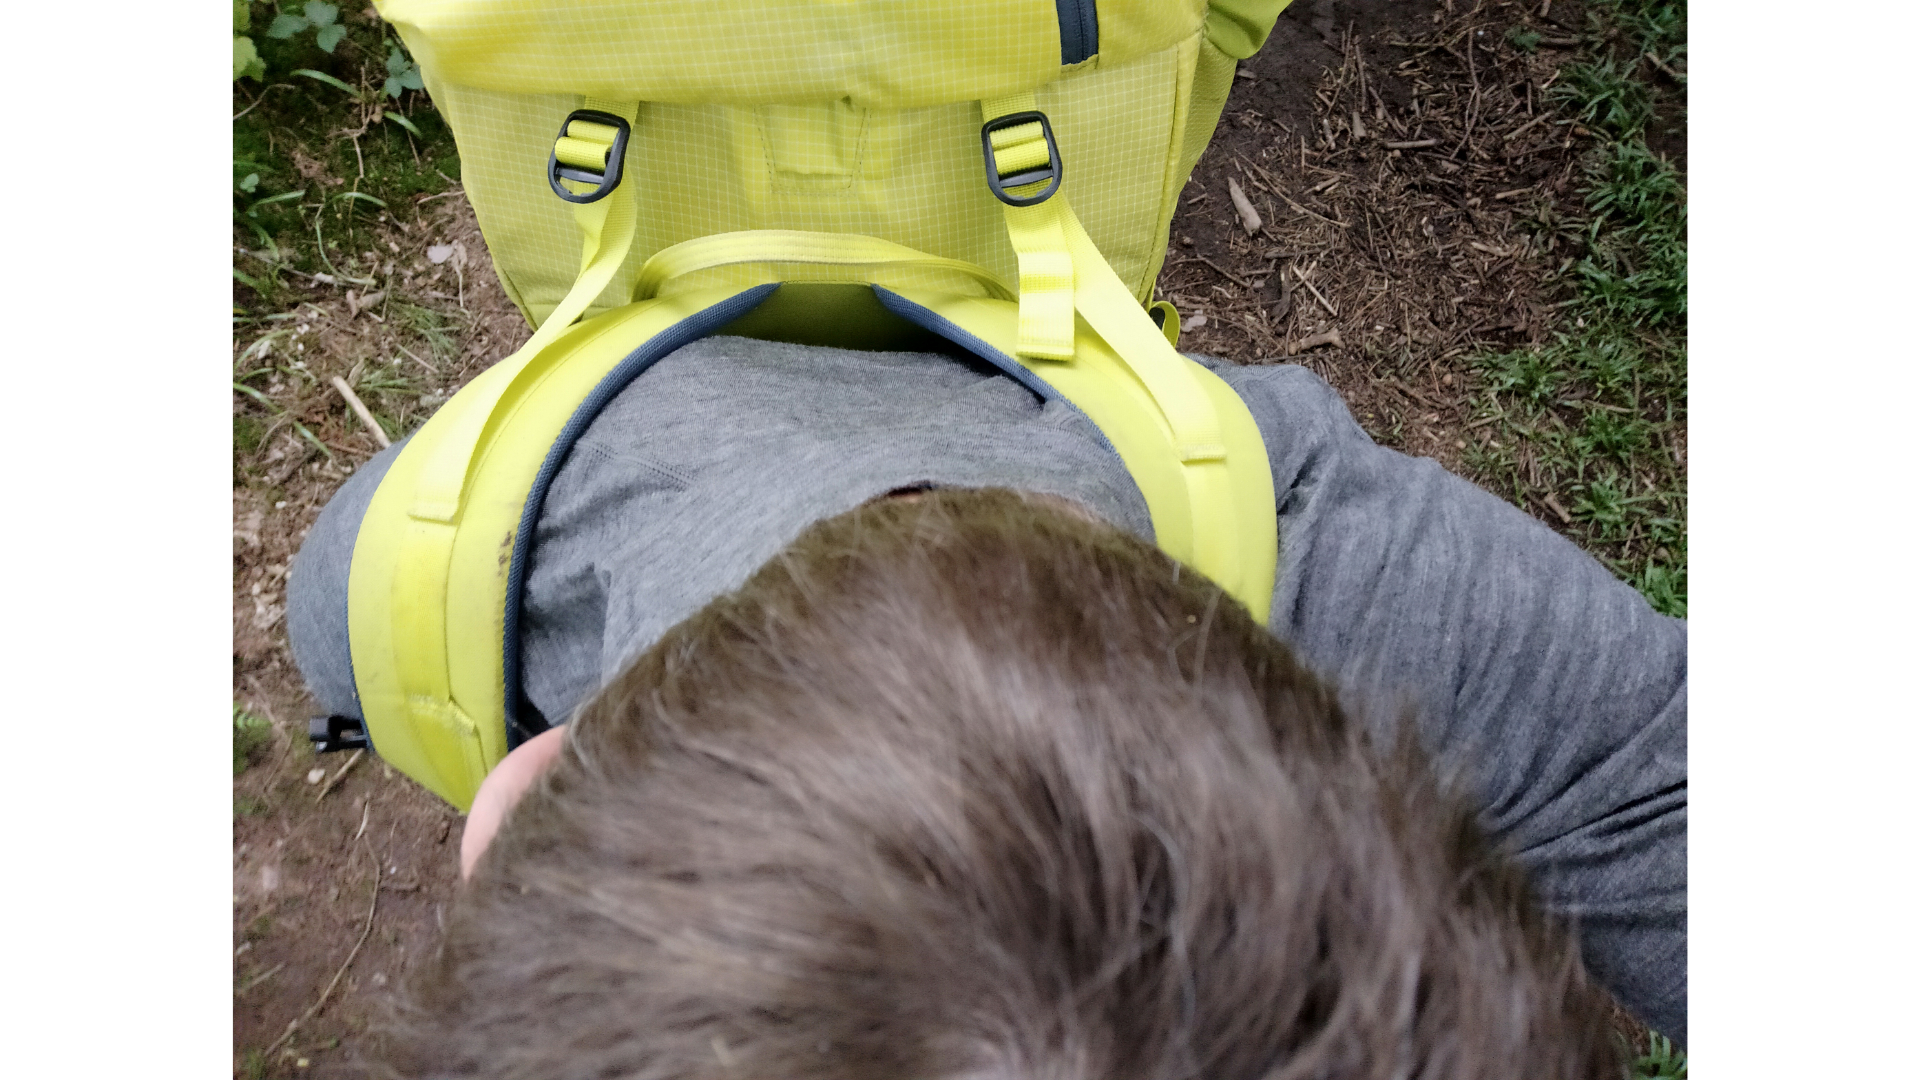
The hipbelt on a backpack serves two purposes. First, on a properly adjusted pack it is the main bearer of weight, supporting roughly 80% of your overall load to the shoulder straps’ 20%. Given this, a hipbelt with ample cushioning is the way to go. The hipbelt’s second function is to keep your pack close to your body and prevent it bouncing around when you’re hiking on inclines, declines, or uneven ground. For this reason, the pack should be adjustable to your waist size so the weight can be spread evenly. In most cases, wider hip belts are more comfortable than narrow ones, which have a tendency to cheese-wire love handles and can chafe the skin above the hips.
Sternum strap
This is the small strap that attaches the two shoulder straps across the chest of the wearer. Along with the hipbelt, it helps to stabilize your load by keeping it tight to your body. For women in particular, it’s worth choosing a pack with an adjustable sternum strap the can be moved up or down to a comfortable position on the chest.
Load-lifter straps
These are the adjustable straps located between the top of the shoulder straps and the back panel. They are designed to keep the weight of the pack towards your torso, which helps to stabilize the load and keep it centered over your hips, and can make a huge difference to the comfort of your pack when properly adjusted.

How to choose a backpack: additional features
A few non-standard features can greatly enhance a backpack’s practicality and convenience. These include:
Sleeping bag compartment
This is a storage compartment at the base of the pack that can be accessed via a separate zipper. It allows you to keep your sleeping bag and in some cases your sleeping pad (see our best sleeping bags and best sleeping pads) separate from the rest of your gear or to separate dry kit from wet kit, sharps from softs, or clean gear from dirty gear.
Side access
This increasingly popular feature takes the form of a zipper in the side of the pack that lets you access gear in the main compartment without opening the top of the backpack and emptying its entire contents.
Rain cover
Many packs these days come with an integrated or removable rain cover that stashes away in its own pocket.
Hydration sleeve
This internal compartment safely houses your water bladder for on-the-go hydration (see water for hiking: how much do you need?). Packs with this feature have a port through which the bladder’s tube can be fed and a clip with which it can be secured to a shoulder strap.
Hipbelt pockets
These are incredibly handy add-ones that help you keep your pant pockets empty and are great for ensuring you’ll have quick and easy access to small essentials like your snacks, phone, GPS device, and compass.
Daisy chain gear loops
These loops of webbing can be used to attach items to the pack’s exterior with carabiners or accessory cord.
Front pockets
Aka “kangaroo pocket”, this usually (but not always) unzippered pocket is ideal for storing larger gear items of gear you will need to access frequently on a hike – i.e. maps, gloves, or mid layers or jackets in changeable weather.
Detachable top lid
The top lid on backpacks can either be integrated (i.e. sewn into the body of the pack) or “floating”. Floating lids provide more space for gear storage in the top of the pack and some can also be removed to use a small summit or day back when basecamping.
Side pockets
Most packs have ‘em, some packs don’t – if you want to access your H2O without having to stop and fish around inside your pack, we recommend plumping for a pack, make sure they’re there!
Compartments and pockets
Some hikers and campers are fans of the unfussy simplicity of a single central “well,” though others -like having several sub-compartments that help to keep their kit tidy and organized. Compartmentalized packs bring the benefit of allowing you to separate wet kit from dry, sharps from softs, and fresh from funky. On the downside, the added fabric used to create those compartments increases their weight and may make it difficult to squeeze in bulky items like tents or sleeping bags. With single-compartment packs, you can always enhance organization by stashing different bits of gear in stuff sacks or dry bags – the only potential problem with this is remembering which bag contains which piece of kit!
Former Advnture editor Kieran is a climber, mountaineer, and author who divides his time between the Italian Alps, the US, and his native Scotland.
He has climbed a handful of 6000ers in the Himalayas, 4000ers in the Alps, 14ers in the US, and loves nothing more than a good long-distance wander in the wilderness. He climbs when he should be writing, writes when he should be sleeping, has fun always.
Kieran is the author of 'Climbing the Walls', an exploration of the mental health benefits of climbing, mountaineering, and the great outdoors.

