If you’ve been hiking for a while, you might be looking into taking on some more challenging trails as your fitness and confidence grows, and a term you might frequently see in trail descriptions is that they contain exposed sections. But what exactly is an “exposed” route in hiking? And what do you need to know before you tackle one?
Between Colorado 14ers, National Parks, the Scottish Highlands and the Alps, I've enjoyed more than my fair share of exposed hiking routes. Some have been easy, some challenging, many thrilling and a few terrifying. Your experience will depend a bit on your own ability level and the nature of the hike, but it’s helpful to start by knowing what the term means and what you might expect, then making the right decisions to ensure you approach them safely and with confidence.
What is an “exposed” route in hiking?
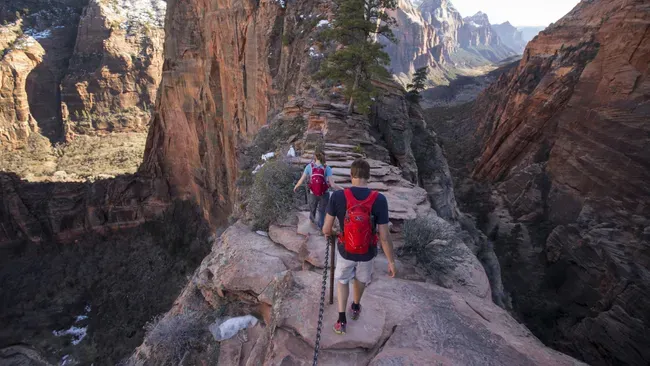
In hiking, a route that’s described as exposed is generally one where there is a steep drop off on one or both sides. An extreme example of an exposed hiking route is Angels Landing in Zion National Park where hikers ascend a narrow rock spine that feels like a razor’s edge with sheer drops of a thousand feet on either side, but many hiking routes that aren’t nearly so dramatic can have exposed sections. How steep the grade needs to be for a route to be considered exposed isn’t defined.

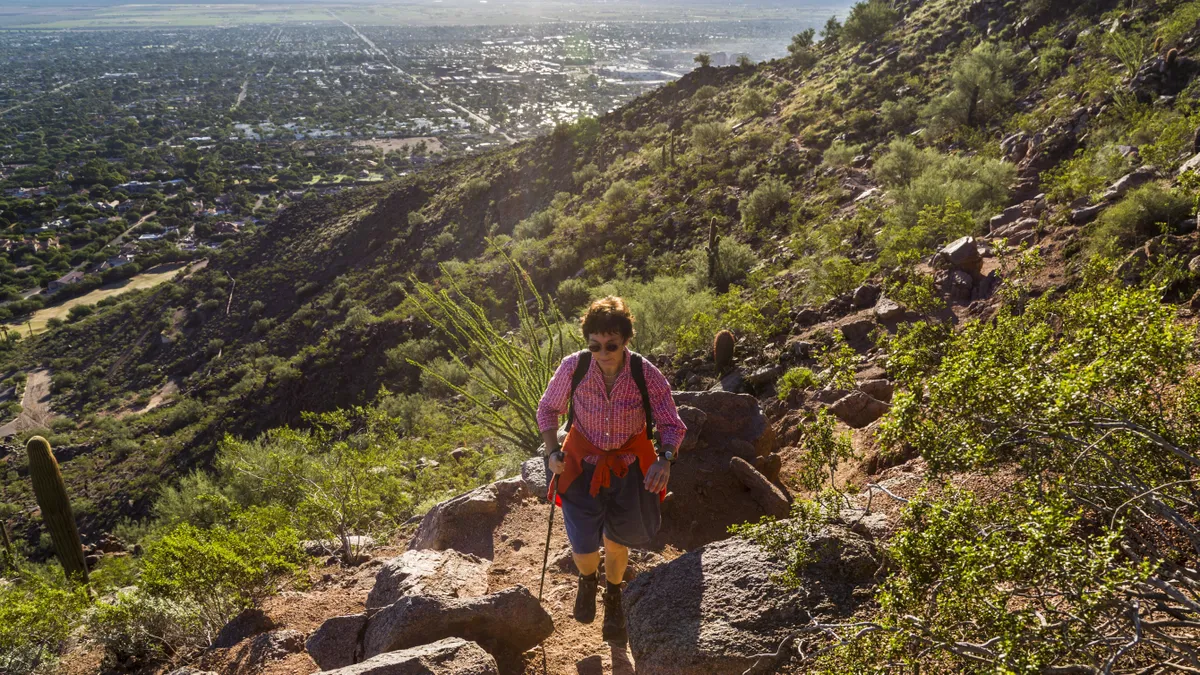
Similarly, though many high elevation routes are exposed, such as those on 14ers, because they often entail steep, rocky climbs to the summit when you get above treeline, a lower elevation trail could still become exposed quickly – take Camelback Mountain as an example. This popular Arizona mountain stands at just 2,706 feet above sea level, but keeps mountain rescue busy year-round.
Though this isn’t necessarily spelled out anywhere, if a hiking route is described as exposed, you can usually assume that it won’t be densely populated with trees since these would break your fall, but it could be littered with scrub, boulders or scree fields.
Some exposed trails require steep climbing and scrambling, but not always. Take the Devil’s Causeway in Colorado’s Flattops, for example. Comparatively speaking, this is a pretty moderate hike, but the land strip that you cross has a sheer drop on either side of up to 80 feet, then another 800 feet or so of scree slopes below. If you’re not scared of heights, walking across it is just like walking across any flat ground, but if you were to stumble or get hit by a big gust of wind, you probably wouldn’t ever see the trailhead again.
Basically, exposure is a bit of a general term that denotes a trail where, if you tripped and lost your footing, you’d be at risk of falling a long way.

Hiking on exposed terrain – what you need to know
As you now know, an exposed hiking trail could be long or short, high or low elevation, difficult or easy – but at some point, you’re going to meet with a section where you could be at risk of falling for longer than you’d like, without much to break your fall. Exposed routes can be exhilarating for many hikers, but terrifying for others. Remember that far more people successfully hike Angels Landing than come to grief on it, and with a few good decisions, you can successfully hike on exposed terrain.
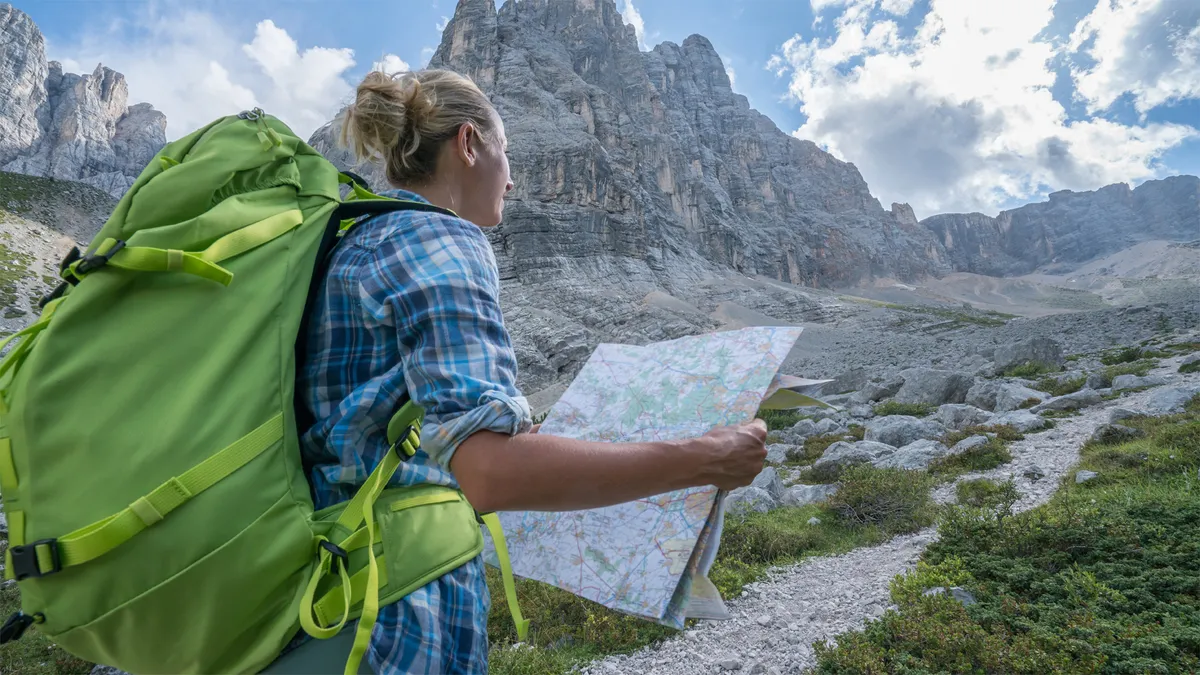
1. Research your route
Before setting off, it’s a good idea to research your route thoroughly. If the exposed section involves a fairly level path, it might inspire a twinge of excitement and nothing more. If the exposed section involves scrambling or technical climbing, you’re going to want to be sure that you have the fitness, skill, equipment and confidence to approach it safely. You’ll want to understand elements like whether you’re likely to already be tired by the time you reach the exposed section, and whether it’s north facing as this could increase the likelihood of complications like icy conditions.
2. Check the weather
Of course, you always want to check the weather before heading out on any trail, if for no other reason than to see if you need to bring a waterproof jacket. If you are crossing an exposed section, however, remember that by nature you’re not likely to have much to protect you from the elements. High winds could knock you off a narrow ridge while precipitation on a rocky surface can quickly cause a trail to become slick. For extreme exposed routes, it’s best to wait for fair weather conditions unless there’s an alternative route.
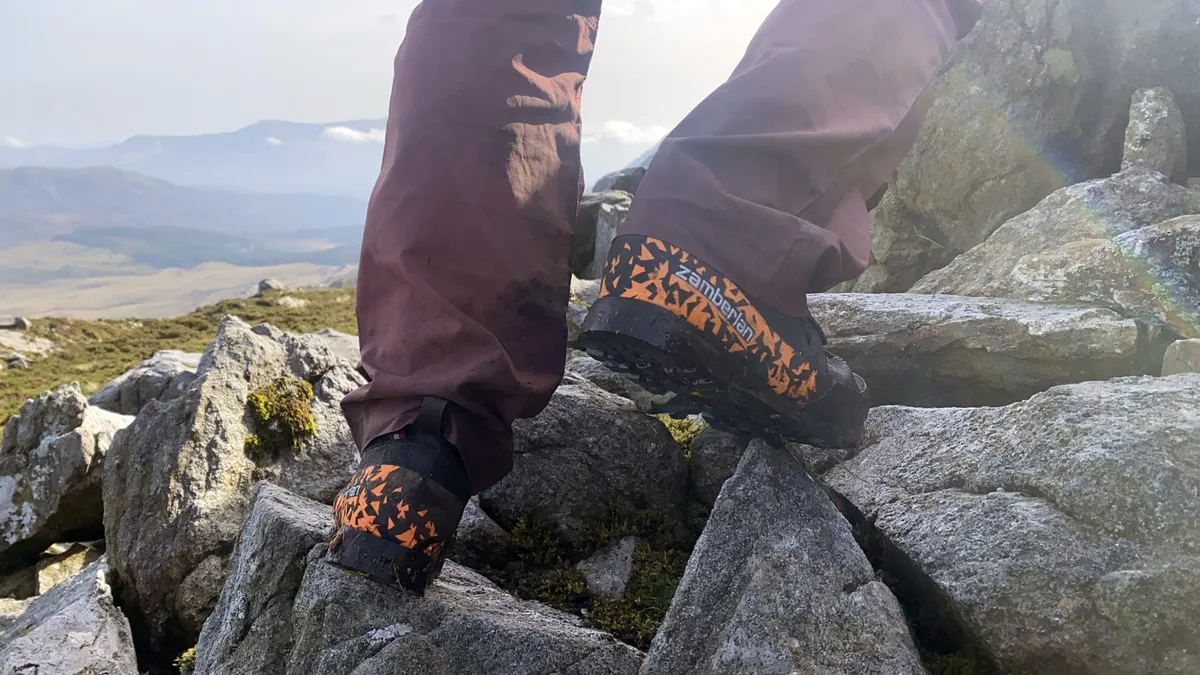
3. Wear the right shoes
Though we always recommend wearing proper hiking boots (or hiking shoes) with good traction when hitting the trail, we’re aware that you might mostly walk on terrain where running shoes will do. If you’ve researched your route and discovered that it may involve scrambling and technical moves, however, you’ll really want to make sure you’re in well-fitting, protective shoes with good grip, laced properly with a double knot, and not tennis shoes (or flip flops, heaven forbid) which could cause you to slip. For routes involving scrambling, check out approach shoes and look for something with a Vibram sole, or similar.
4. Know your options
When you reach the exposed section of your hike, stop and look around. Assess whether you think you have the skill to cross safely – some exposed routes look more dangerous than they are, while others may seem deceptively easy. It’s also worth noting if there’s an alternate route available. It may be safer to stay a bit lower and find a different path. Remember that if there’s only one way to cross, there’s probably only one way back if you’re on an out-and-back trail, so you need to be confident enough to cross twice.
5. Stow your poles
This isn’t a blanket rule by any means, but if you do hike with trekking poles, you may want to pack them away for the exposed section, particularly if it’s a narrow, steep and rocky section. This allows you to use your hands to grab onto rock for balance, whereas a hiking pole could slide out from under you and cause you to take a tumble. Similarly, it’s good to do a quick gear check and make sure your backpack straps are fastened and you don’t have any loose straps that could catch on a trail hazard and cause you to fall.

6. Focus
When it’s time to tackle an exposed section, the most important thing you can do is make sure you have your wits about you. Look around, pause any conversations you’re having and be mindful of how you place your hands and feet. If you’re on rocky terrain, test rocks before you put your weight on them. If there’s any up or down climbing, consider whether you’re more stable facing towards the rock or away from it. Give other hikers space to cross at their own pace. Take your time, breathe and make good decisions.

